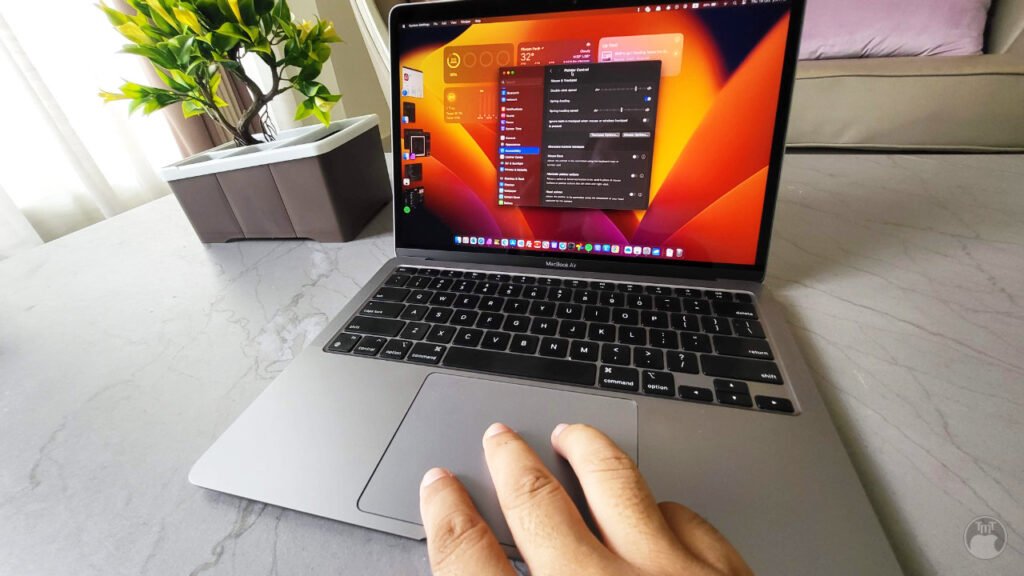
One of my favorite features of a Mac is the ability to select or drag a window, text, or file by simply moving my three fingers across the trackpad. It is much easier than clicking and holding to select or drag.
The feature was once easy to find and configure inside the trackpad settings. However, in the newer macOS version, it has been moved deep under the Accessibility settings. This tutorial will guide you in enabling the feature on both older and newer macOS versions.
To enable the three-finger dragging feature on a Mac, open System Settings, select Accessibility, click on Pointer Control under the Motor section, then click Trackpad Options…, turn on the Use trackpad for dragging switch, and change the dragging style to Three Finger Drag. For more detailed directions, check the following step-by-step guides.
How to enable three-finger dragging on a Mac
To allow dragging with three fingers with trackpad on macOS, do the following:
To enable the feature on a Mac with macOS 12 Monterey or later:
Open System Settings from the Apple menu (in the top corner of your screen).

Click on the Accessibility tab and select Pointer Control under the Motor section.
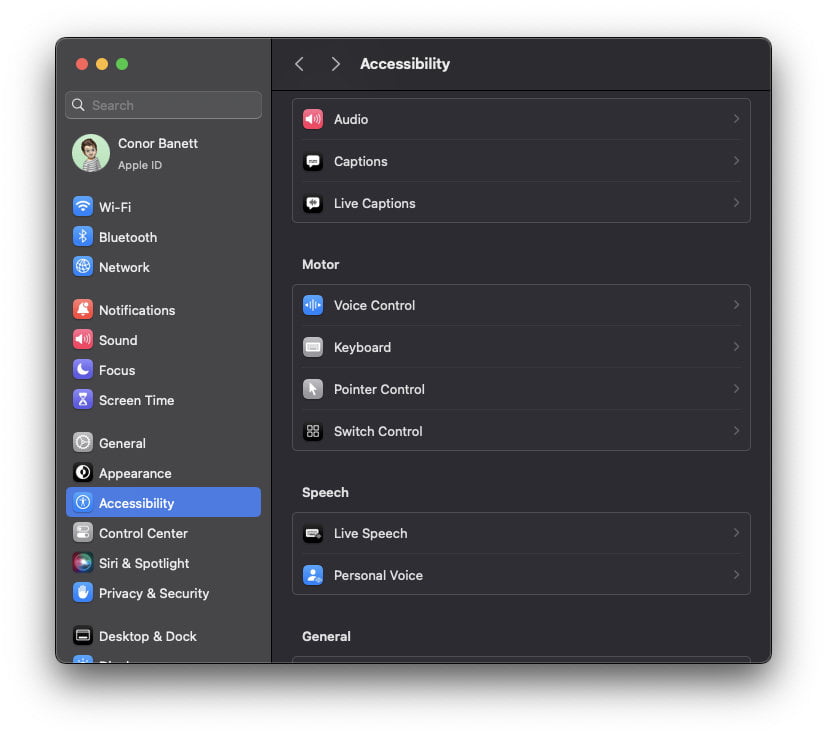
On the Pointer Control page, click “Trackpad Options…“.
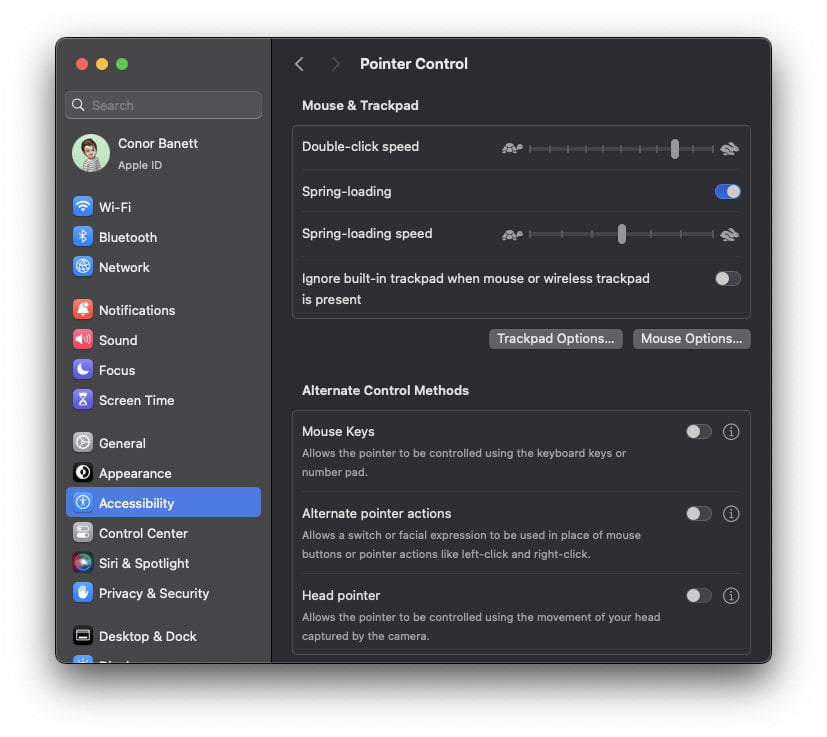
It will show a dialog with the following default options.
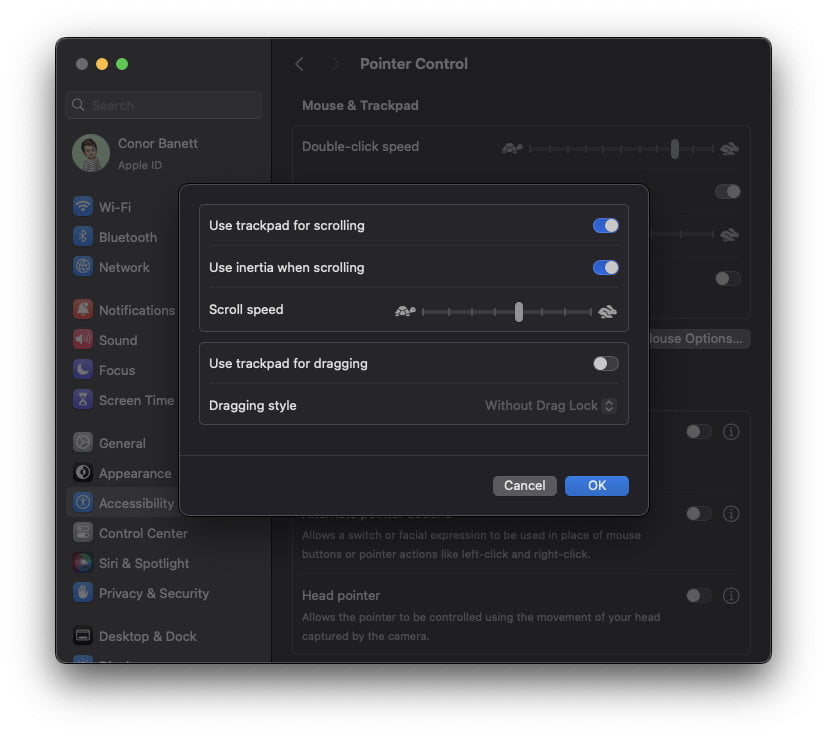
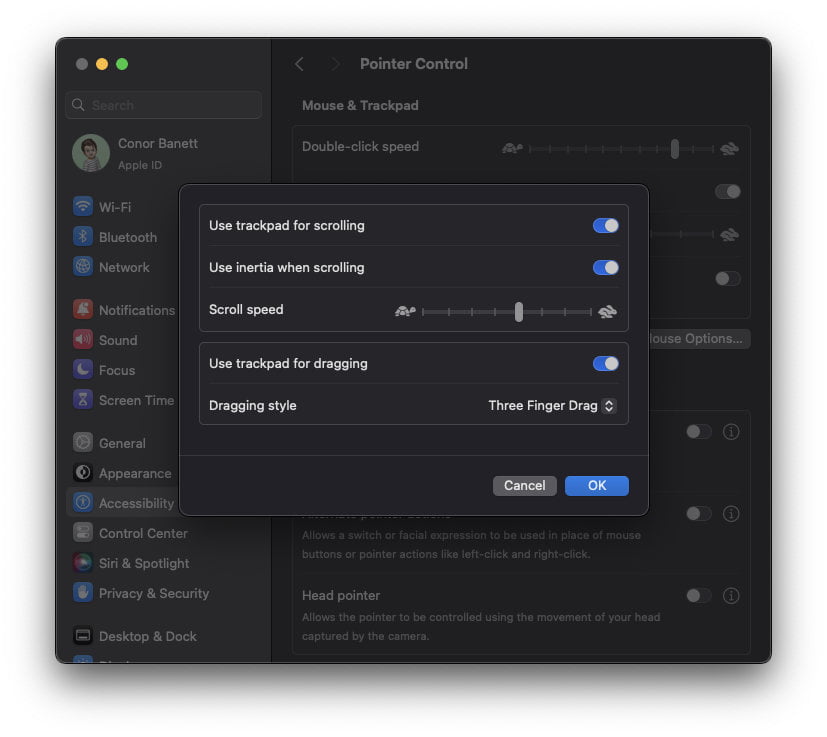
Turn on the Use trackpad for dragging toggle switch, and change the Dragging style from Without Drag Lock to Three Finger Drag.
To enable the feature on a Mac with Mac OSX 10.0 up to macOS 11 Big Sur:
Open System Preferences from the Apple menu (in the top corner of your screen).

Click on the Accessibility icon.
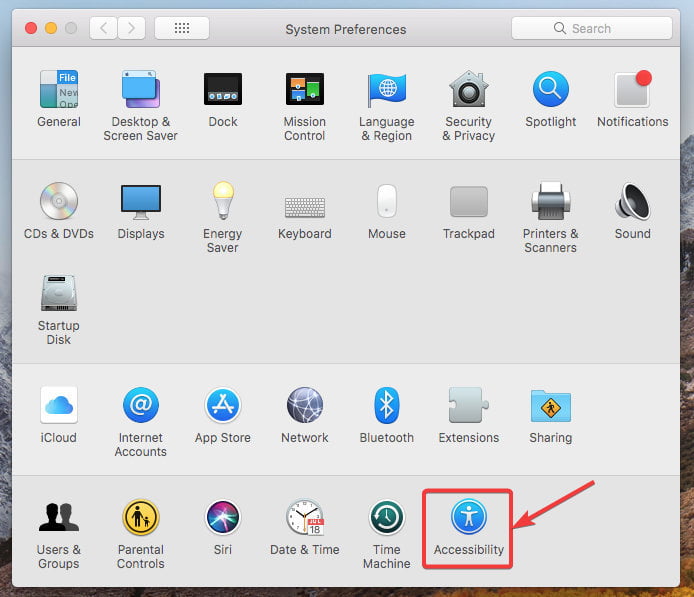
Select the Mouse & Trackpad tab and click the “Trackpad Options…” button.
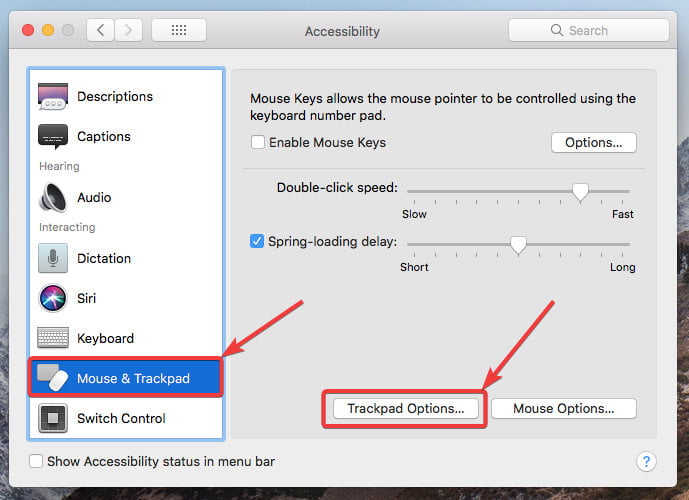
Check the Enable dragging checkbox, and change the Dragging style from Without drag lock to three-finger drag.

Now, you can select and drag anything on your MacBook or Magic Trackpad by just moving your three fingers on the trackpad. If you have any queries or issues with the instructions provided in this tutorial, please don’t hesitate to let me know by commenting below.

